PySpark — Unit Test Cases using PyTest
Understand how to write unit test cases for PySpark using PyTest module.
We all write code to develop data applications. To make sure the code is working as expected at ground zero level, we need to write Unit Test Cases. This article will help you start with Unit Test Cases in PySpark. We are going to use PyTest Python module to create and run our test cases.

Before we can begin, we need to install PyTest module in Python. Once done we will begin with our setup.
pip install pytest
Now if you are new to Spark, PySpark or want to learn more — I teach Big Data, Spark, Data Engineering & Data Warehousing on my YouTube Channel — Ease With Datahttps://medium.com/media/bc2c16be6ddb2223368ba8421c13f202/href
Next, we will create a tests folder which will hold all the required test cases and other code.
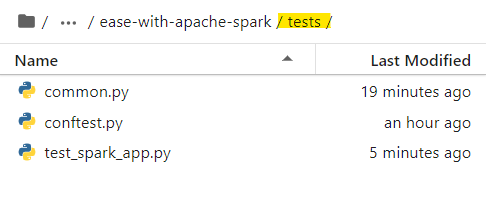
For this example we will create following three files:
- conftest.py — This file serves as a means of providing fixtures for an entire directory.
- common.py — This file holds all the common re-usable code.
- test_spark_app.py — This file contains the unit test cases.
Before we begin, lets discuss about Fixtures. PyTest module uses Fixtures, which are basically functions which run before the test case providing them necessary Inputs, URLs, Database connections etc. We will use Fixture to create SparkSession and supply it for the test cases.
So, lets create our PyTest Fixture to generate SparkSession in conftest.py file.
import pytest
from pyspark.sql import SparkSession

@pytest.fixture(scope="session")
def spark_session():
    spark = SparkSession \
        .builder \
        .appName("Spark Unit Test") \
        .master("local[*]") \
        .getOrCreate()

    return spark
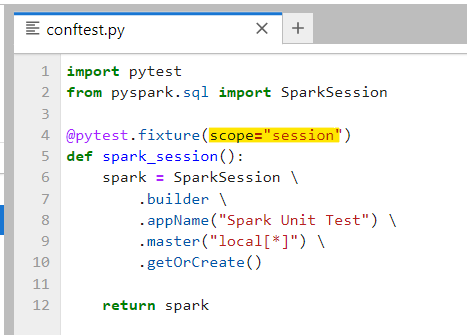
The above code will generate a fixture — spark_session, which will serve as an input for test cases. Now, we defined the scope as “session” that implies our fixture(which is a SparkSession) will automatically be destroyed as soon our test session ends.
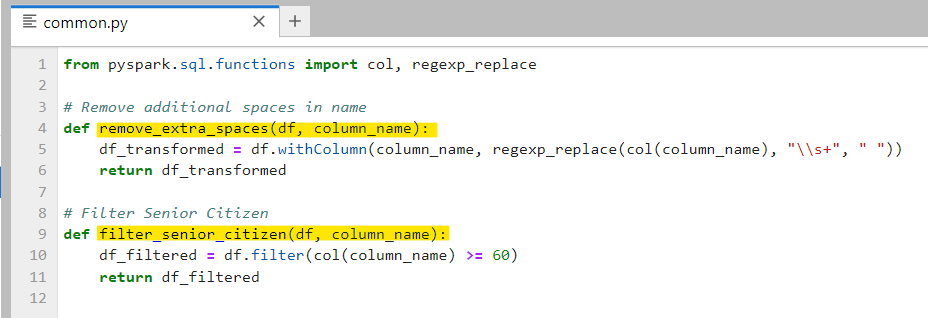
Next, our common.py will hold two functions first to remove extra spaces in names and other is to filter out senior citizens (age ≥ 60).
from pyspark.sql.functions import col, regexp_replace

# Remove additional spaces in name
def remove_extra_spaces(df, column_name):
    df_transformed = df.withColumn(column_name, regexp_replace(col(column_name), "\\s+", " "))
    return df_transformed

# Filter Senior Citizen
def filter_senior_citizen(df, column_name):
    df_filtered = df.filter(col(column_name) >= 60)
    return df_filtered
Finally, our test_spark_app.py file will contain three test cases as following:
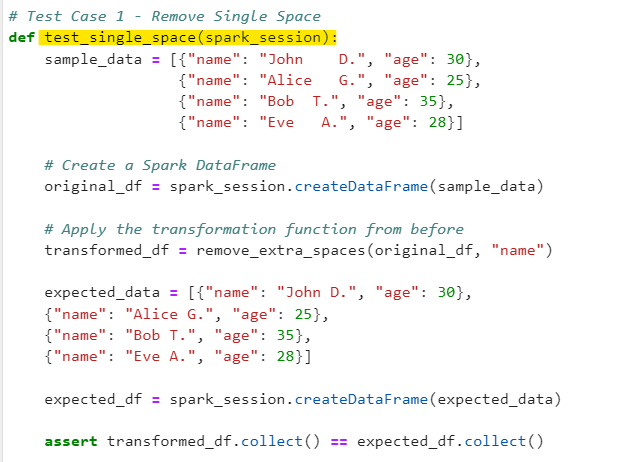
Test Case 1
Remove extra Spaces from the names of the employees. We will use assert to verify if the expected data is matching the sample.
# Test Case 1 - Remove Single Space
def test_single_space(spark_session):
    sample_data = [{"name": "John    D.", "age": 30},
                   {"name": "Alice   G.", "age": 25},
                   {"name": "Bob  T.", "age": 35},
                   {"name": "Eve   A.", "age": 28}]

    # Create a Spark DataFrame
    original_df = spark_session.createDataFrame(sample_data)

    # Apply the transformation function from before
    transformed_df = remove_extra_spaces(original_df, "name")

    expected_data = [{"name": "John D.", "age": 30},
    {"name": "Alice G.", "age": 25},
    {"name": "Bob T.", "age": 35},
    {"name": "Eve A.", "age": 28}]

    expected_df = spark_session.createDataFrame(expected_data)

    assert transformed_df.collect() == expected_df.collect()
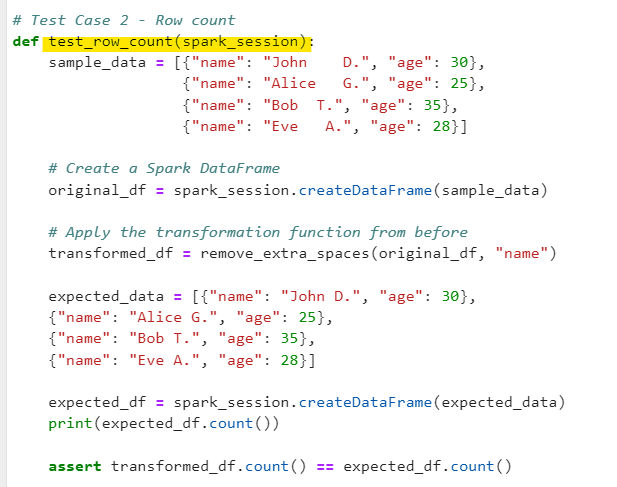
Test Case 2
Verify the count of employees.
# Test Case 2 - Row count
def test_row_count(spark_session):
    sample_data = [{"name": "John    D.", "age": 30},
                   {"name": "Alice   G.", "age": 25},
                   {"name": "Bob  T.", "age": 35},
                   {"name": "Eve   A.", "age": 28}]

    # Create a Spark DataFrame
    original_df = spark_session.createDataFrame(sample_data)

    # Apply the transformation function from before
    transformed_df = remove_extra_spaces(original_df, "name")

    expected_data = [{"name": "John D.", "age": 30},
    {"name": "Alice G.", "age": 25},
    {"name": "Bob T.", "age": 35},
    {"name": "Eve A.", "age": 28}]

    expected_df = spark_session.createDataFrame(expected_data)
    print(expected_df.count())

    assert transformed_df.count() == expected_df.count()
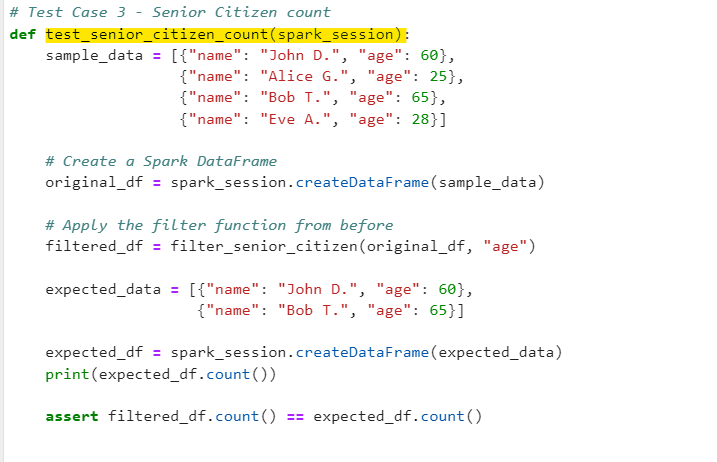
Test Case 3
Filter Senior Citizen employees (age ≥60)
# Test Case 3 - Senior Citizen count
def test_senior_citizen_count(spark_session):
    sample_data = [{"name": "John D.", "age": 60},
                   {"name": "Alice G.", "age": 25},
                   {"name": "Bob T.", "age": 65},
                   {"name": "Eve A.", "age": 28}]

    # Create a Spark DataFrame
    original_df = spark_session.createDataFrame(sample_data)

    # Apply the filter function from before
    filtered_df = filter_senior_citizen(original_df, "age")

    expected_data = [{"name": "John D.", "age": 60},
                     {"name": "Bob T.", "age": 65}]

    expected_df = spark_session.createDataFrame(expected_data)
    print(expected_df.count())

    assert filtered_df.count() == expected_df.count()
Note: Make sure to start the names of test cases with test_. This help Pytest to differentiate between test cases and normal functions.
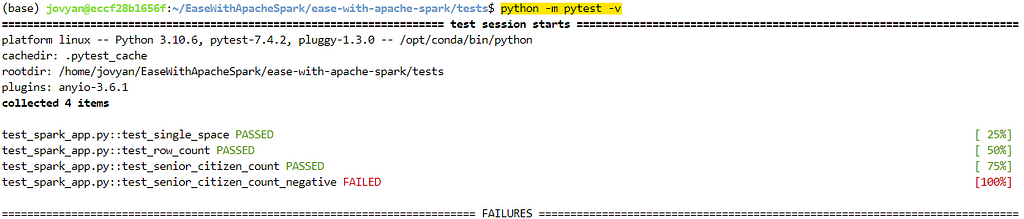
Once we have the test cases ready. We can trigger the pytest module in verbose mode to see the results.
(run the below code in tests directory)

python -m pytest -v
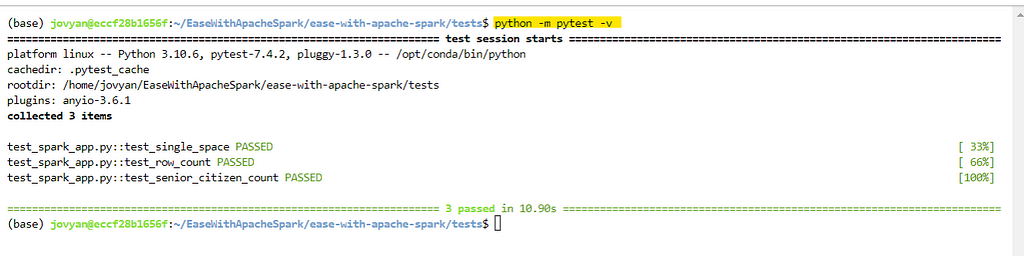
Awesome, it identified all 3 test cases and all test cases passed successfully. Lets create a negative case to fail (to check if our code is working as expected).
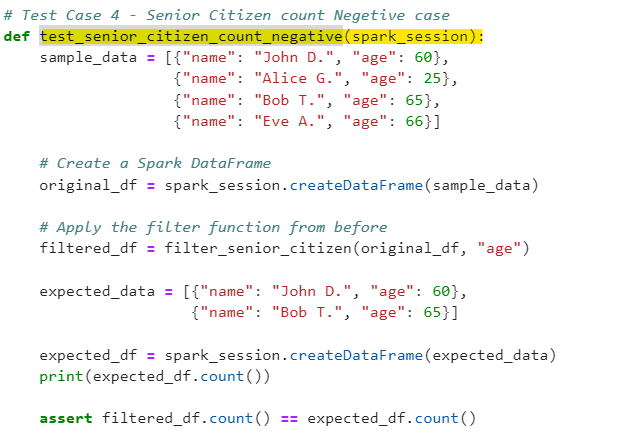
Test Case 4
Senior Citizen count Negative case
# Test Case 4 - Senior Citizen count Negetive case
def test_senior_citizen_count_negative(spark_session):
    sample_data = [{"name": "John D.", "age": 60},
                   {"name": "Alice G.", "age": 25},
                   {"name": "Bob T.", "age": 65},
                   {"name": "Eve A.", "age": 66}]

    # Create a Spark DataFrame
    original_df = spark_session.createDataFrame(sample_data)

    # Apply the filter function from before
    filtered_df = filter_senior_citizen(original_df, "age")

    expected_data = [{"name": "John D.", "age": 60},
                     {"name": "Bob T.", "age": 65}]

    expected_df = spark_session.createDataFrame(expected_data)
    print(expected_df.count())

    assert filtered_df.count() == expected_df.count()
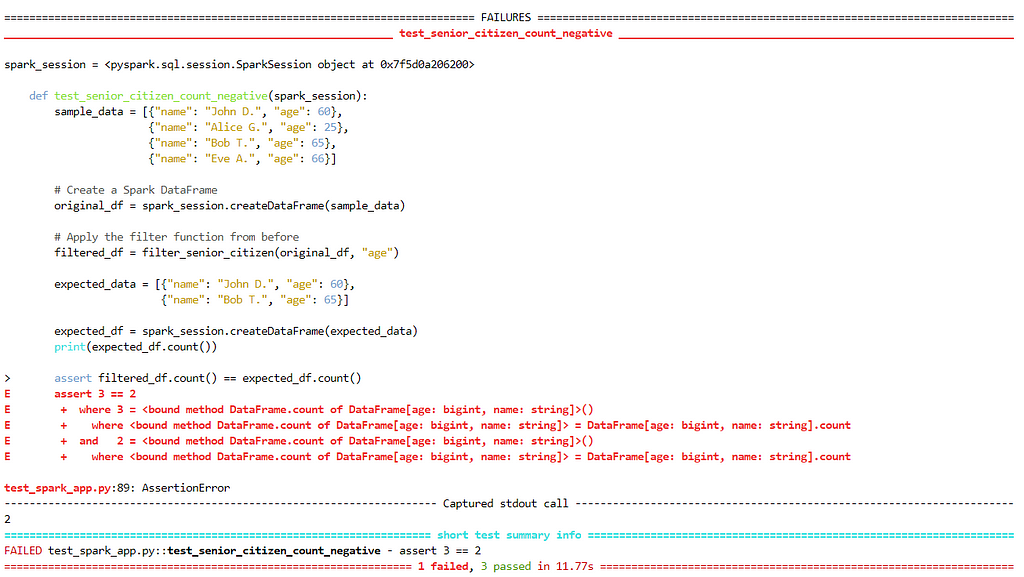
Lets re-run our test cases to validate.
Great, we validated all scenarios. We can find the details about the FAILED test case summary below.
Conclusion ✌️
We created sample unit test cases for our PySpark application with the help of Python PyTest module. This examples can further be enhanced to read data from files and other data sources with complex test cases.
Now if you are new to Spark, PySpark or want to learn more — I teach Big Data, Spark, Data Engineering & Data Warehousing on my YouTube Channel — Ease With Data
Make sure to Like and Subscribe ❤️
Checkout Ease With Data YouTube Channel: https://www.youtube.com/@easewithdata
Wish to connect with me: https://topmate.io/subham_khandelwal
Checkout the code on Github — https://github.com/subhamkharwal/ease-with-apache-spark/tree/master/tests
Checkout my Personal Blog — https://urlit.me/blog/
Checkout the PySpark Medium Series — https://subhamkharwal.medium.com/learnbigdata101-spark-series-940160ff4d30
Reference
PySpark — Unit Test Cases using PyTest was originally published in Dev Genius on Medium, where people are continuing the conversation by highlighting and responding to this story.
Top Five
Following are the top five articles as per views. Don't forget check them out:
Buy me a Coffee
If you like my content and wish to buy me a COFFEE. Click the link below or Scan the QR.
Buy Subham a Coffee
*All Payments are secured through Stripe.

About the Author
Subham is working as Senior Data Engineer at a Data Analytics and Artificial Intelligence multinational organization.
Checkout portfolio: Subham Khandelwal